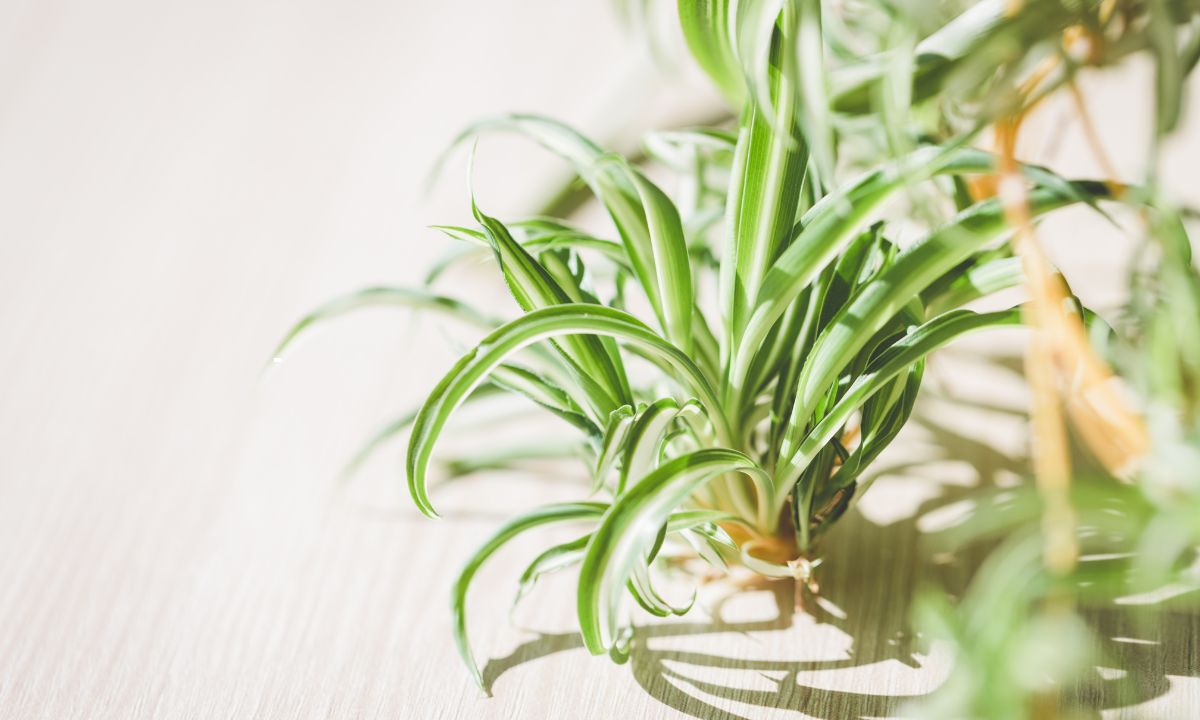
If your spider plant (Chlorophytum comosum) looks leggy, sparse, or tired, you don’t need luck—you need a plan. Bushiness in spider plants comes from more growing points, healthy roots, and balanced light/water/nutrients. The fastest way to create that full, fountain-like look is a three-part strategy: targeted pruning, smart division, and repotting at the right time. This guide gives you clear, step-by-step instructions, timing tips, and mistakes to avoid so your spider plant rebounds into a dense, vibrant showpiece.
Bushiness 101: What Actually Makes a Spider Plant Full?
- Multiple crowns = more leaves. Each crown (growth point) produces its own leaves. More crowns = thicker plant. You create more crowns by division and by encouraging offsets (“pups”) to root around the parent.
- Healthy roots drive top growth. Tight, ropy roots can power the plant, but severely root-bound pots eventually stall growth and thin foliage. Timely repotting restores vigor.
- Light & feeding set the pace. Bright, indirect light plus regular, mild feeding produces compact, plentiful leaves. Dim light stretches growth and looks sparse.
Part 1: Pruning for Bushiness (Shape, Stimulate, and Clean)
Pruning doesn’t just tidy your plant—it redirects energy to stronger crowns and encourages new, compact leaves.
Tools & setup
- Clean, sharp scissors or pruners
- Isopropyl alcohol for sterilizing blades
- Paper towel or cloth
- Optional: stakes or a turntable for easy access
What to prune—and why
- Brown tips and edges:
- Snip along the natural leaf shape, leaving a thin green margin if possible. This improves appearance immediately without stressing the plant.
- Cause often = water quality or salt buildup. Pair with a soil flush (slowly run water through the pot for 2–3 minutes).
- Aged or yellowing leaves at the base:
- Remove entire leaves close to the crown. This frees light and airflow for younger leaves.
- Leggy stolons (runners) with many pups:
- If the mother looks thin, reduce runners temporarily. Fewer pups = more energy for foliage density.
- Keep 1–2 pups for propagation and future fullness.
How to prune (step-by-step)
- Sterilize blades. Wipe with alcohol before you start and between plants.
- Start with the worst leaves. Remove fully yellow or split leaves at the base.
- Tip-trim cosmetically. Follow the leaf’s taper so cuts look natural.
- Thin the runners (optional). Cut some stolons back to the crown; keep the ones you’ll root.
- Flush the soil (if salts are suspected). Let excess drain thoroughly.
After-prune care
- Place in bright, indirect light (not harsh midday sun).
- Resume a light feeding schedule (see fertilizing section below).
- Expect a visible perk-up within 2–4 weeks as new leaves compact the look.
Pro tip: If you only prune but never address pot size or roots, bushiness improvements plateau. Combine pruning with division or a timely repot for best results.
Part 2: Division for Instant Density (Multiply Crowns, Multiply Leaves)
Division is the quickest way to “manufacture” bushiness. By splitting one overgrown plant into multiple, then grouping them back into a single pot, you create an instant multi-crown display.
When to divide
- Roots circling heavily, pushing above soil, or pot sides bulging
- Water runs through too quickly or plant dries out within 1–2 days
- You want immediate fullness (before a party, staging photos, etc.)
How to divide (step-by-step)
- Hydrate the day before. Moist roots are more flexible and resilient.
- Unpot and inspect. Loosen the soil mass; shake gently to reveal crowns.
- Identify natural sections. Look for cluster points where leaves emerge.
- Separate by hand first. If needed, slice cleanly between crowns with a sterilized knife.
- Trim dead roots. Remove mushy or black roots; keep the firm, white ones.
- Potting strategy:
- Option A: Immediate bush effect. Combine 2–3 divisions together in one pot (arranged 360°) for a fuller look now.
- Option B: Grow out separately. Pot divisions individually to size them up; later, combine the strongest into a single display.
After-division care
- Use a well-draining mix (see recipe below).
- Water thoroughly once, then allow the top 1–2 inches to dry before the next watering.
- Keep in bright, indirect light and avoid heavy feeding for 2–3 weeks while roots settle.
Part 3: Repot Timing (The Sweet Spot Between Snug and Stalled)
Spider plants enjoy being a bit root-bound, but too tight causes stress and sparse growth. Repotting at the right time gives roots room to expand, creating more foliage up top.
Signs it’s time to repot
- Roots peeking from drainage holes or lifting the plant above the rim
- Soil dries within 1–2 days despite normal conditions
- Water instantly rushes through (hydrophobic, compacted mix)
- Persistent leaf tip burn despite good water quality and flushing
Best seasons to repot
- Spring or early summer are ideal (fast recovery).
- Early fall is acceptable in warm climates with stable indoor temps.
- Avoid deep winter unless necessary.
Pot size & material
- Go only 1–2 inches wider than your current pot. Oversizing slows growth and risks soggy soil.
- Terracotta helps with airflow and prevents overwatering; plastic retains moisture longer (fine if you water carefully).
Spider plant soil recipe (peat-free friendly)
- 40% high-quality potting mix (or coco coir)
- 30% perlite or pumice
- 20% fine bark (orchid bark)
- 10% compost or worm castings (lightly—don’t overdo nutrients)
Mix should feel airy, drain well, and still hold enough moisture to support active growth.
Light, Water, and Feeding: The Bushiness Boosters
Light
- Aim for bright, indirect light: near an east window or a few feet back from a south/west window with sheer curtains.
- Under grow lights, target 10–12 hours/day at moderate intensity. Too much intensity can bleach variegation.
Water
- Water when the top 1–2 inches are dry. Avoid extremes (constantly soggy vs. crispy-dry).
- If you have hard water or fluoride issues (common cause of brown tips), try filtered, rain, or distilled water and flush monthly.
Fertilizer
- During spring–summer, feed every 4–6 weeks with a balanced, diluted fertilizer (e.g., 1/4 strength 10-10-10 or organic equivalent).
- Pause or reduce feeding in winter. Overfertilizing leads to salt buildup (and brown tips).
Using Pups to “Layer” Bushiness
Spider plants produce pups on runners. You can root pups around the mother to create a fuller pot.
How to layer pups in place:
- Place a small pot with fresh mix next to the parent.
- Pin the pup’s base onto the mix (use a hairpin or bent paperclip).
- Keep slightly moist for 2–3 weeks until roots grab.
- Cut the runner once rooted and either keep the pup in its own pot or transplant back into the mother’s pot for extra crowns.
This approach builds density without fully unpotting the mother plant.
Timing Blueprint: A Simple Bushiness Calendar
- Early Spring:
- Major prune + repot (if needed) + divide for instant multi-crown fullness.
- Start light feeding and adjust the plant to brighter light.
- Late Spring–Summer:
- Maintain shape: tip trims, remove aged leaves.
- Layer pups around the pot; keep 1–2 runners only.
- Early Fall:
- Minor prune; evaluate pot tightness. Repot if severely root-bound and your indoor temps are stable.
Winter:
- Hold steady. Reduce water and feeding. Bright, indirect light is key to prevent legginess.
Common Mistakes That Keep Spider Plants Sparse
- Oversized pots. Too much soil volume = wet feet, slow root expansion, sluggish foliage.
- Low light for months. Leads to stretched, thin leaves and fewer offsets.
- Never pruning runners. Excess pups siphon energy from foliage density.
- Skipping soil flushes in hard-water areas. Salt buildup → brown tips, stressed growth.
- Heavy fertilizer. Overfeeding burns tips and does not equal faster bushiness.
- Neglecting division. One crown can only do so much—multiply crowns to multiply leaves.
Quick Troubleshooting
- Still sparse after pruning? Check light first; move closer to a bright window or add a grow light.
- Roots circling like crazy? Repot up one size and consider division to add crowns.
- Plenty of runners, few leaves? Cut back most stolons for a month to redirect energy.
- Brown tips keep returning? Switch to filtered/distilled water and flush soil monthly.
FAQ
How do I make my spider plant bushier fast?
Combine a spring prune with division (2–3 crowns in one pot) and bright, indirect light. Feed lightly every 4–6 weeks.
Should I cut off spider plant babies?
If the mother looks thin, temporarily reduce pups to channel energy to foliage. You can root a few and return them to the pot for extra crowns.
Do spider plants like small pots?
They tolerate being slightly pot-bound, but severely compacted roots stall growth. Repot up 1–2 inches when water runs through quickly or roots bulge.
Can I split a spider plant any time of year?
You can, but spring/early summer offers the quickest recovery and best bushiness.
What’s the best soil for a bushy spider plant?
An airy, fast-draining mix: potting mix or coco + perlite/pumice + fine bark, with a touch of compost or castings.
Final Takeaway
A bushy spider plant isn’t an accident—it’s the result of intentional pruning, multiplying crowns by division, and repotting at the right moment. Keep light bright but indirect, water on a measured rhythm, and feed lightly. Trim runners when the mother needs a boost, then reintroduce rooted pups to thicken the display. Follow this playbook and you’ll transform a sparse spider plant into the lush, arching fountain you’ve been aiming for—quickly and reliably.




Leave a comment
This site is protected by hCaptcha and the hCaptcha Privacy Policy and Terms of Service apply.